

and the front here:
Following Julie's example, I ran pieces of boning up over the shoulders again. I think she got this idea from Sempstress. It worked for the corset; hopefully it will work here as well. The boning is pretty light in the dress, but I've given up hope that I'll be able to wear this sans corset anyway....with that ladder lacing in the front, I think it would be pretty unattractive.
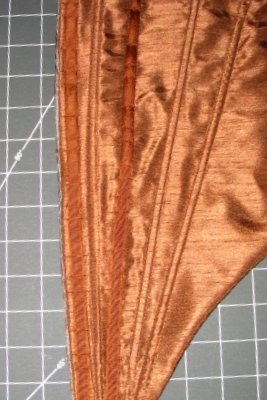
The ladder lacing is held in place with a double row of ribbons after Jen Thompson's example. It worked really well once I actually went to her description and did it correctly, duh. I put the ribbon strips directly over my boning and stitched right through them. My sewing machine wasn't delighted with this, but it did do a fine job of securing everything into place. Helpful hint #1: don't use a plastic yarn needle to lace the dress; they don't respond well to shear stress. I really like the ladder lacing, although I'll have to figure out what I want to lace the dress with exactly. Helpful hint #2: single-ply worsted isn't a good choice, even for a test fit...single-ply = pulls apart...duh again. Here's a close-up of my lacing strips. Note that there are extra points sewn across. Right...ready, fire, aim.

No pictures of the outside just yet. I've got the lining and outside sewn together, but need to sew up the armholes before modeling it. More commentary on that tomorrow.
1 comment:
Wow! Imagine my surprise to find TWO new posts! I'm very impressed with your petticoat, and you have definitely inspired me to add more cording to mine, since yours poofs more and I'm jealous. Great straps, too, though I had to double take to see them with the shirt.
The bodice thus far looks amazing, and I love the idea of the stitched ribbon for lacing through. Never noticed that on JT's site, and now i wish I had. My ladder lacing "method" is laughable viewed from the inside. I should post it so that all may chuckle.
"Wow" pretty much expresses my thoughts. You're quick! I best get crackin!
Post a Comment