Tuesday, July 11, 2006

again with the lousy photography

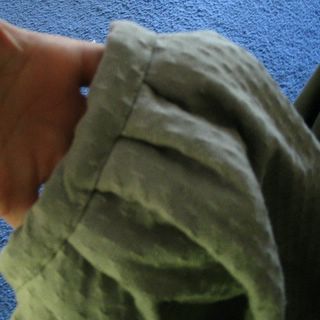
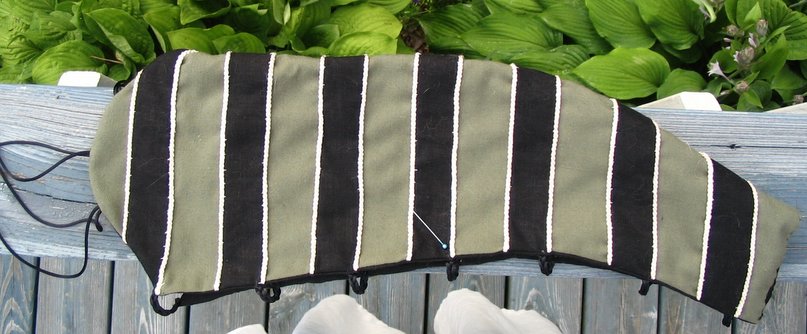
I should really get the dress engineer to photograph stuff for me. It's really hard to shoot a picture of one's own arm for instance. At any rate, here are the new sleeves (um, only sleeves) for my green-dress-of-continual-improvement. The sleeve is lying flat on the deck railing because of the aforementioned complete inability to take pictures of my own arm. However, aren't the hostas lovely?
 
The sleeves were done using Julie's basic sleeve pattern, which every time I discover is just a bit too small for me. It fits, but I'm not at all fond of snug sleeves. After I got it sewn together the first time, I decided that it would annoy me, so I took it apart and reinvented it as a sleeve with an opening down the front. So here's the front opening, and while it's maybe not what I would have originally envisioned, it's a lot more comfortable (and presumably cooler). Since I have only the tiniest scraps of green fabric left, this is going to have to do!

  Posted by Picasa

Monday, July 10, 2006

bad photos and badder hats

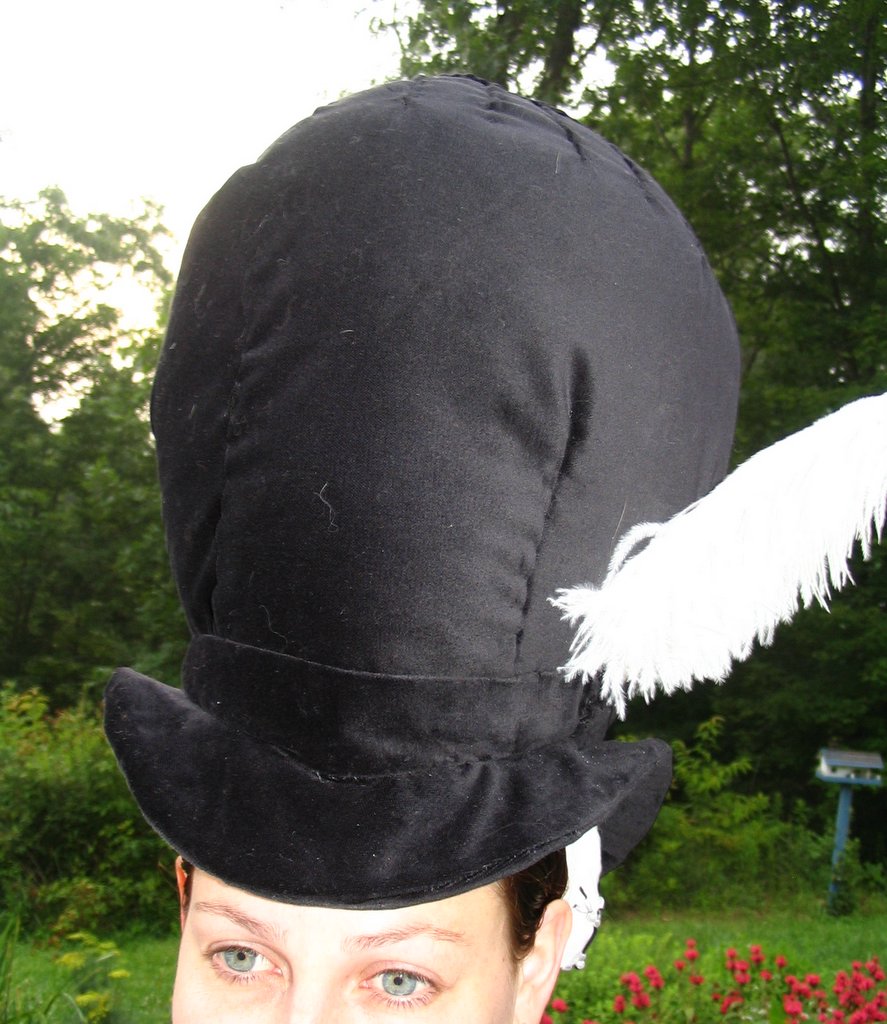
This makes me think of Marilyn Manson for some reason. Oh right, because I look insane. But not really. Like nobody would *actually* be afraid of me, no matter how hard I try. I digress.

 
So the hat of extreme big-ness is done. It turned out to be a lot harder than I thought (go figure) to apply the velvet layer. It is....ok. It's not great, despite all the handstitching down of pleats and whatnot. It's still got a lot of impact, seeing as how it's a hat that's taller than my head, eh? And if that's not enough impact, I can always head-butt someone with it...now THAT would be quite an impact. I can't wait to see Auntie Tina's jewel on there, but the vaguaries of the mail being what they are, I decided to post some pictures now anyway.

Taking pictures of one's head by oneself is pretty hard. Particularly for those of us who can't figure out how to work the timer on the camera, ahem, hint hint dress engineer. Oh. He says to read the manual. Here, I don't look quite so psycho in this one:
 

And here it is from the side. One thing I'm not sure I like is how far down the brim ends up curving in front and back. It looks very cool that way from the front, not so sure from the side. So I'll just sidle about the faire, turning madly this way and that in an attempt to always be looking at people face-on. Nuts, right? Yeah, well I'm the lady in the ginormous hat, I'm allowed to be nuts.
  Posted by Picasa

Monday, June 26, 2006

hat part 2

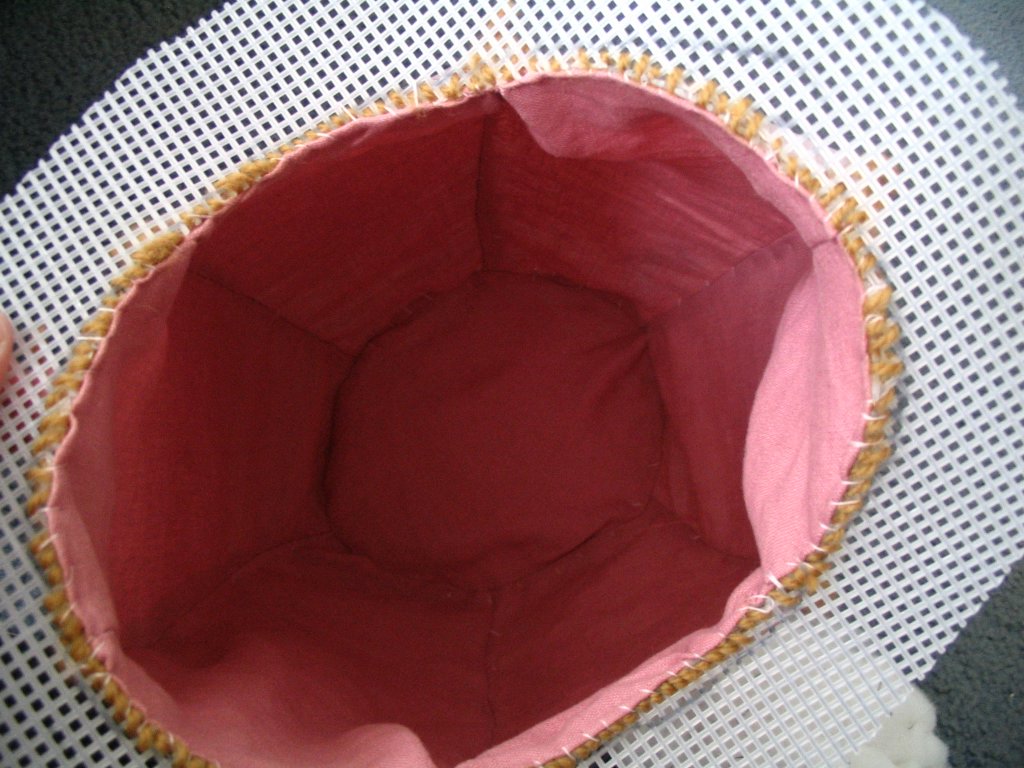
I think the hat is getting even larger and more ridiculous. Since the last post, I have sewn up all the seams properly, then added a pink linen lining, like so:
 
It isn't perfect, but I think it'll do. I figured linen would feel nice against my head, and the pink is the result of an unfortunate dye job. It was supposed to be a nice rust color for a jerkin for Aaron. He nixed this color. Shame.

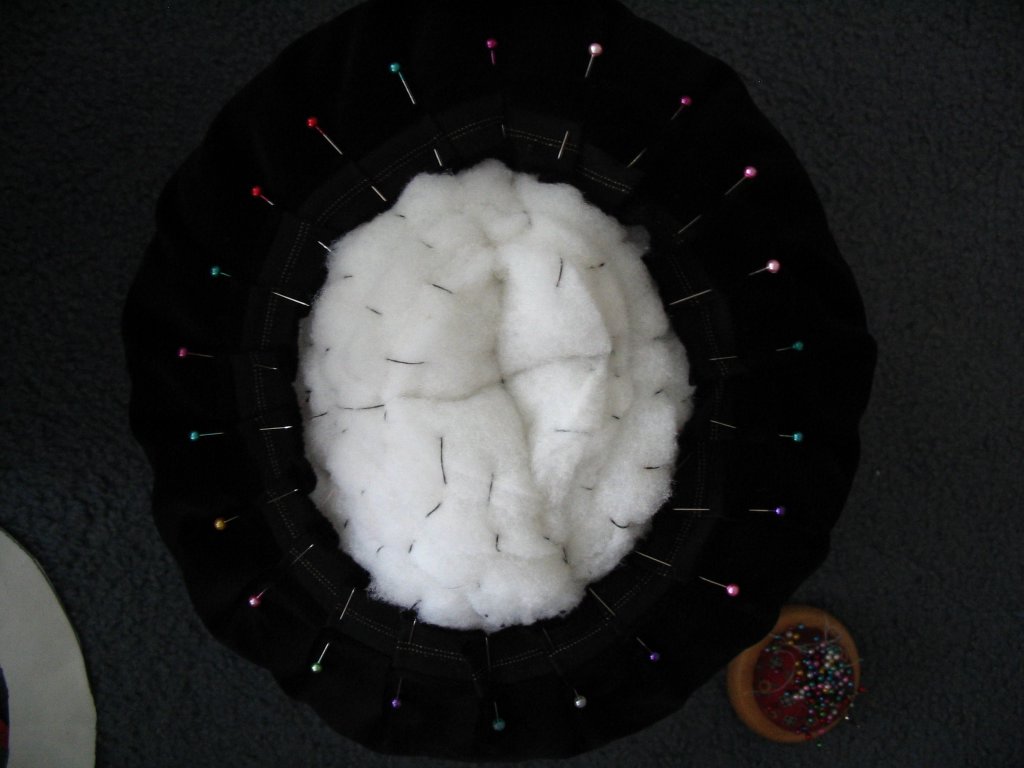
I went ahead and used some quilt batting to pad the structure a little bit. I was hoping to tone down the faceting on the crown of the hat. This would be where the "getting even larger and more ridiculous" comes in, but I think it's necessary. No pictures of that, sorry. I added heavy-gauge wire to the brim in case I want to tinker with the shape of the curve after I'm done. I've also begun to cover the hat with some very nice black cotton velvet. Here's my attempt at arranging pleats at the top.
 
You can see here the little pancake stack of batting that I've used to make the top (hopefully) domed. And may I just say that this is a ridiculous shape to try to cover. I've been tinkering with pleats at top and bottom. This hat is pretty much stuck in the "almost done but I'm not quite happy with it" phase. Hopefully I can sort it out! Posted by Picasa

Wednesday, June 21, 2006

my hat is bigger than your hat

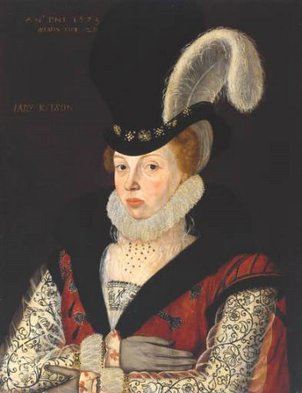
Meet Lady Kytson:
 
Or at any rate, meet her hat. It’s quite a hat. Indeed, if you compare her to various other portraits, her face is much lower in the painting than average to accommodate that gloriously silly hat. After Julie started messing around with hat-making (and complaining about the largeness and silliness of the hats), I decided it was time to work on the hat I’ve been coveting. Also, I think I’ll have to start cultivating that “I smell something foul, perhaps it’s a peasant” facial expression. To use on my husband.

Step 1: Analyze the hat. The height of Lady Kytson’s hat is roughly 150% that of her face, tapers up to a bulbous sort of shape, and has an exceedingly arched brim. I’m not sure what the fabric might be, as it’s a black-on-black portrait, but I’m going on the assumption that the very nice cotton velvet that supposed to be arriving in my mailbox tomorrow would be a good choice. She’s got some sort of enormous bendy feather on the side, which I’ll have to look for. She’s also got a bunch of brooches? buttons? jewels? who knows? stuck all around the base of the crown. That too, I’ll have to consider. I may do a simple band, since my character isn’t supposed to be quite as hoity-toity as all that.

Step 2: Make a paper mockup on a small scale to see how the curves will come together. Decide that it’s the proper size for the dog. Chase the dog around with a paper hat and a camera. Always an important step in any sewing endeavor, right?

 
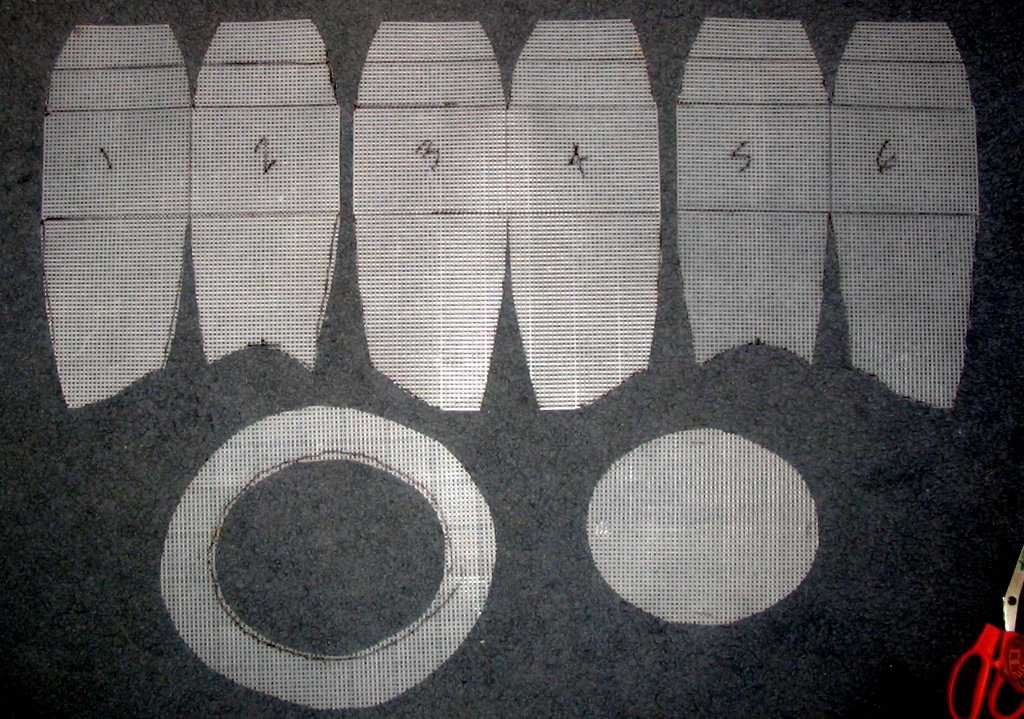
Step 3: Lay out a pattern. Definitely don’t bother to research the pattern, just start tinkering. Surely high school geometry is good for something. I am using plastic canvas because that’s readily available locally, whereas buckram is not. Also, while I do know how to make tacky Kleenex box covers, I do not know how to work with buckram. No doubt as I sweat under this enormous plastic hat, I’ll regret this decision, but there’s nothing new about that. Here’s what I ended up with for a pattern after a couple of tries:

 
Step 4: Stick a few stitches on each side to make sure that this hat is going to go together approximately right. And by approximately right, I mean that it should make the husband choke with laughter. Apparently, it was approximately right. I made the husband compare the portrait and me a number of times to see if the proportions were in the ballpark. After all his squinting and measuring with his fingers and all, he was unable to conclude that the hat was too big. If anything, he said, it might be a smidge small. Hard to believe I know. So then, here is the aptly-named “mock up.” You may commence mocking. On a side note, I can still walk through doorways, so that’s good.


Step 5: Take it apart and start sewing it together properly. No pictures of that yet, but it’s going along swimmingly. Plastic canvas is really fun to sew on. Oh, also, additional mocking at this point would be fair. As if that weren’t self-evident. Posted by Picasa

Tuesday, June 13, 2006

better


The dress engineer has a very particular code of ethics on certain things. Specifically, he's very reluctant to offer false praise on my handiwork. So when he didn't have much to say about my first foray into wool embroidery, I figured I needed to do better. A bit of reading up in a basic embroidery book yielded the idea of using my previous work as the underlayer for a bit of padded satin stitch. It seems to have worked out ok. For one thing, the color density came improved a lot. Once I made the flowers heavier, I thought the chain stitch stems looked a bit spindly, so I tried backstitching through them. Those might still get changed if I can learn how to do something more interesting. Still, an improvement, no? Or in the dress engineer's unsolicited opinion, "hey, that looks sort of pretty now." High praise indeed. Posted by Picasa

Friday, June 09, 2006

tinkering with wool

 
So I've done a little bit of tinkering with wool embroidery. I'll be the first to say that I know not a darn thing about embroidery beyond backstitch and cross-stitch, but apparently I'm catching on to chain-stitching too. This is wool floss on black linen, started at the VA renaissance faire. It was supposed to turn into a needle case, but seems to be much too big, so it'll be the ubiquitous sweetbag instead. I'm trying to randomly teach myself some stitching with it. Like satin stitch, and um....more chain stitch maybe. I'm not sure what I'm doing, but I think this'll look nicer than a plain black pouch. Either that or it'll look like something I did in kindergarten. Either way is ok really.

 
The design I'd scribbled out is this, which is what happened when I squinted my eyes at the inside of a blackworked dress? collar? partlet? worn by Mary Tudor. I changed the 8 petals to 5 because....I just felt like it. Also, the Tudor rose and all that. Posted by Picasa

Wednesday, May 31, 2006

out and about

 Posted by Picasa


The Virginia Faire this year was hot, hot, HOT, so we were sans sleeves for the most part. Julie did get brave and tie hers on for sake of the picture. We’ve agreed that we will probably never match so nicely again!

 Posted by Picasa


Here are the four of us at the end of the day wielding our wondrous parasols, which really helped with the heat. The verdict’s still out on whether these are really period, but this research suggests yes, and I’ll support any research that’ll make me less hot! The guys have their new peasanty garb, and I’ve got a black and green pinned-on partlet based on one of the designs in The Tudor Tailor, which I really like incidentally.

 Posted by Picasa


We got to talk with Norm the Pikeman, who has the most amazing store of knowledge on military history. We enjoyed chatting with him, and he also had the guys learn some pike moves. I think in this one maybe they’re poking a bad guy, but not a bad guy on a horse, but I couldn’t say for sure, having placed myself very far from the guys with the poke-y sticks.

 Posted by Picasa


I still have a handful of things that I’d like to do for this outfit before I put it away for the next faire. Namely:

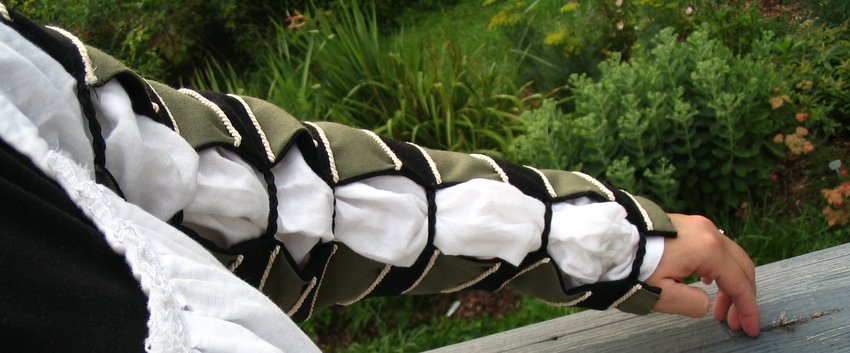
1. Finish the sleeves. They’re presently ribbon-bedecked, so I need to replace that with matching linen guards. I think while I’m at it, I might try to make them a little bigger; I see no reason that I can’t expand them with a little gusset disguised as a stripe so they’ll fit over a puffier chemise than the peasanty one that the original sleeve was designed for. Also, I’m going to go ahead and line them. I wasn’t going to, but really, I’m not going to wear these unless it’s something other than 90F so...why not?

2. A hat. I rather covet one of those tall bulbous ones, but I’ll be looking into that shortly. I’ve never made a structured hat before, so we shall see! I did admire some arch-brim ones that were being made by a woman at the faire, but it seems like almost everyone on the court who wears a stiff hat wears one of those, and I’d like something a bit different.

3. Some sort of embellishment for the guards. I am thinking about just couching down some white or grey cording of some sort. I’ll need to figure out a design.

4. A pouch. I made one the night before of black and green linen which is perfectly serviceable, but I also started an embroidered design on black linen with wool while at the faire, which I think would be nice done up in much the same way. It’s not very well executed, but I’m new to embroidery (other than backstitching!) and was making it up while sitting on hay. I’ll post some pictures if it doesn’t turn out completely terrible.
Thursday, May 25, 2006

compromises

Since there is pretty limited time remaining to make this outfit wearable, I decided to make some compromises. It’s going to be really hot this weekend, so I decided not to worry about fixing the sleeves. They need to have all of the ribbon trim replaced with linen guards, and I’m not very happy with the fit on them anyway. So then, they’re off the list. That’s ok, though, since I replaced that handwork with something else! I decided to edge my existing partlet with black (and not-so-incidentally, monofilament to stand up better). I finished it last night, but all I have is this partway done picture. There is now also black edging (and monofilament) down the front edge as well, which makes a nice contrast and also causes the front to curve out nicely.

 Posted by Picasa


I had originally thought that I’d just thread the monofilament through the existing ruffle to give it more body, but that proved to be nearly impossible, which is when I decided to whipstitch black embroidery floss over it. It turned my basically flat box pleats into something closer to a ruff. I say “closer” because if I’d wanted a figure 8 ruff, I should have used a 5-1 pleating ratio instead of 3-1…there’s not enough fabric to force it into figure 8’s without distortion. The other thing that I did to get the ruffles to behave was to run a line of linen thread through the ruffle about halfway down, sort of like doing cartridge pleating after the fact. Without it, the stiff top edge could contort into a bunch of different configurations, but with it, there’s really only one choice.

I did a little playing with a really classy brooch I got from Goodwill. Here it is before in all of its rhinestone-bedecked glory:

 Posted by Picasa


And here it is after I pried out the rhinestones and glued in adventurine beads and glass pearls. Sorry the picture quality on the tacky before is so much better.

 Posted by Picasa

While I had all the layers on to mark the hems, I had the dress engineer snap a shot showing the amount of “boo-tay” generated by the padded pleats in the underskirt. I’m wearing a farthingale, a simple gathered petticoat, the stiffer gored grey petticoat, and the knife-pleated dress. I just can’t warm to the whole bumroll concept, as I’m sure I’d end up with it badly positioned, but I think this looks pretty full.

 Posted by Picasa


So indeed, it looks like the hems really will be done at the last minute. How….shocking…. The dress engineer graciously crawled around on the floor with scissors. His opportunities for poking me were pretty limited by the farthingale (yay armor), so it was a much faster operation than usual. I just need to add hems to the petticoat and dress and then I think I’ll be all set! I wish I had a tall hat to go over the caul, but there’s just not time. I also have assorted plans to couch and/or bead the guards on the dress, but that was never in the plan for this time around.

Monday, May 22, 2006

strike a pose

There was a fair bit of sewing this weekend, but I wasn’t in the mood to model it myself, so I thought it only fair that these guys should earn their kibbles. That’s right, I’m one of *those* people. Those people who dress up their pets.

 Posted by Picasa


Here’s Lucy, looking sweet yet flirtatious in a single shoulder roll, stuffed with linen scraps for a nice firmness. Cutting and sewing all those little loops was somewhat of a nuisance, but I couldn’t resign myself to the spiral I was thinking of doing. It was messy, and I couldn’t remember if I’ve seen a portrait. I’ve only got one sewn on the dress as yet.

 Posted by Picasa


Yep, plainly born to model. Look at that eyeliner. All natural that. We were out on a hike one day and had a stranger comment on her eyes. I told her it was a real pain getting the dog to hold still for the eyeliner. Boy did she ever give me a dirty look. Sheesh people, no, I don’t put makeup on my dog. Only dirty socks on occasion.

 Posted by Picasa


And next up we have the debonair Dexter Dog modeling a ….hey wait. Is that poor dog wearing a snood? Oh man. His union rep is going to have something to say about this. Ahem. So here’s the finished caul at any rate. I’ll probably wear it at somewhat less rakish of an angle.

 Posted by Picasa


Here’s the closeup of the beading prior to making it into a little caul and using it to offend my dog’s sensibilities. This was really a fun way of doing a cheater net. I just used backstitching through the beads, so everything was done in two perpendicular passes. No going back and sewing on beads afterwards.

 Posted by Picasa


And well, yeah, here’s my hand modeling the 4th take on putting a waistband on the petticoat. I didn’t really think putting the petticoat on the cat was going to go over so well. I think this time it actually worked. It’s possible that I got a wee bit smarter and did some pinning this time. I also padded the pleats on the backside with two layers of felt for additional butt-tastic-ness.

By my count, that just leaves me with one shoulder roll to attach, a bottom guard to add, two hems to do, a partlet to make, and possibly some sleeve trim to replace. By Friday. Eh. No problems.

Thursday, May 18, 2006

girdle

There’s been a brief hiatus in sewing, mostly due to the arrival of my order from Fire Mountain Gems. (Ooh, bright shiny object over here!)

 Posted by Picasa


The big ivory-colored ones are aragonite, the small peach ones are adventurine, the fake pearls are…fake pearls, and the green ones are some random rock that simulates jade, jade being too expensive for me. It’s strung on the heaviest gauge tigertail that I could get and held together with several crimp beads, which I pretty much squashed into oblivion, not having a proper crimping tool. No matter. Originally, there were supposed to be tiny garnet beads on there, but they were so small that they were stripping the wire, so I substituted the pearls.

 Posted by Picasa